The 72-Hour Truce: A Clinical 3-Day Scalp Reset to Vanquish Bumps, Scabs, and Sudden Agony
I. The Emergency Triage: Why the 3-Day Scalp Reset Is a “System Restore”
A 3-Day Scalp Reset is not about washing more. Instead, it’s about stopping the damage.
When your scalp has bumps, scabs, or heat, it is inflamed. That means your skin is in panic mode.
Because of this:
- Your immune system releases inflammatory signals
- Your scalp becomes reactive and painful
- Even gentle products can sting
So, continuing your normal routine makes things worse.
In simple terms, your scalp needs a pause.
That’s why this reset gives your skin 72 hours to calm down and start repairing itself.
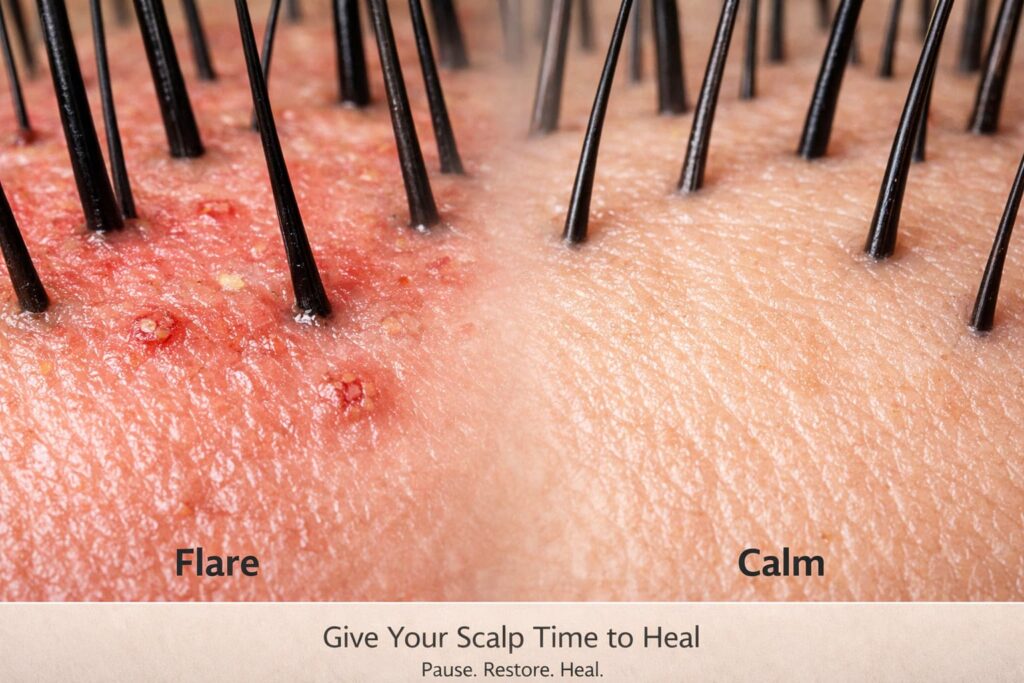
II. Anatomy of a Flare: What Bumps and Scabs Really Mean
The “Bumps” (Follicular Occlusion)
Bumps form when pores get blocked.
This happens when:
- Oil gets trapped
- Dead skin builds up
- Microbes grow inside
As a result, your body reacts and creates inflammation.
The “Scabs” (Barrier Breach)
Scabs mean your skin barrier is broken.
This can happen when:
- You scratch
- You use harsh shampoos
- Your scalp gets stripped
So now, tiny cracks form on your scalp surface.
Why the Itch Feels So Intense
There is a chemical called Substance P. It sends strong itch signals to your brain.
Because your barrier is weak:
- Nerves are more exposed
- The itch feels sharper and harder to ignore
So, the more you scratch, the worse it gets.
III. Day 1: The De-Escalation Phase (Gentle Cleanse)
The Goal
First, remove dirt and triggers. However, do not strip your scalp.
What to Do
- Use a low-foam or no-foam cleanser
- Keep the pH close to 5.5
- Rinse with lukewarm water
This helps clean your scalp without breaking it further.
What to Avoid
- Medicated shampoos
- Harsh sulfates like SLS
These can burn and worsen the damage.
IV. Day 2: The Structural Repair Phase (Soothing Mask)
The Goal
Now, you repair the damage. That means sealing cracks and stopping water loss.
What to Use
- Ceramides
- Cholesterol
- Centella Asiatica (Cica)
These help rebuild your skin barrier.
The Technique
Use a lukewarm compress.
Steps:
- Apply your repair mask
- Wrap or cover the scalp lightly
- Let it sit
This pushes hydration deep into your skin.
V. Day 3: The Protection Phase (Light Hydration)
The Goal
Now, shift from repair to balance.
What to Use
- Light, non-greasy hydrators
- Ingredients that won’t clog pores
This keeps your scalp calm without triggering another flare.
What to Avoid
Heavy oils like:
- Coconut oil
- Olive oil
These can feed yeast and make inflammation worse.
Final Step
Add a light barrier product like ScalpRx.
This acts like a shield while your scalp stabilizes.
VI. Flare-Up Triage Guide (Quick Table)
| Symptom | Biological Cause | Reset Action | What to Avoid |
|---|---|---|---|
| Painful bumps | Blocked follicles | Day 1: pH-balanced rinse | Harsh acids (too strong) |
| Itchy scabs | Skin cracks | Day 2: Lipid repair mask | Picking or scrubbing |
| Wild flaking | Fast turnover | Day 3: Light hydration | Heavy oils |
| Local heat | Inflammation surge | Cool water (<25°C) | Heat, steam, blow-drying |
VII. Conclusion: From Emergency to Control
A flare is a signal. It means your scalp barrier or internal balance is off.
The 3-Day Scalp Reset gives your scalp time to recover.
Instead of reacting fast, you slow things down.
Because of that:
- Inflammation reduces
- Skin starts repairing
- Symptoms calm down
Next step:
- Take the Diagnostic Wheel Quiz
- Find your personal trigger
- Prevent the next flare before it starts
Then, move from short-term fixes to long-term control.